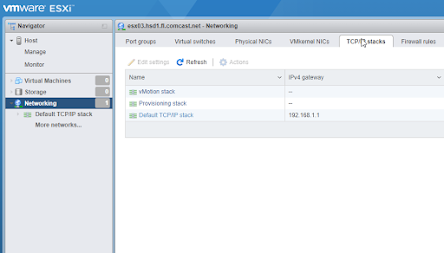
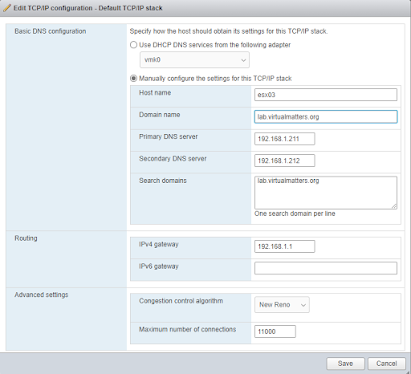
Here is a quick tip for anyone that has deployed an ESXi host from a home network or received DHCP values that didn't match your intended configuration.
Search This Blog
Saturday, January 9, 2021
Updating the DNS Search domains and FQDN Hostname for an ESXi Host.
Reusing Disks from a Previous vSAN
This post may be mostly relevant to home-lab builders, but if you have previously configured vSAN on the disks used in host, you may not be able to easily reuse them in a new vSAN.
Lets take a look at my specific use case.
I want to install vCenter 7 and I want to establish vSAN on the host during this process.
For this installation I am going to install on host ESX03 , I previously used the internal disks for a vSAN cluster, but I am upgrading from hybrid to all flash using a 1TB SSD that I recently acquired.
Saturday, January 2, 2021
Probably a bright spot for HomeLabs in the ESXi 7.0 U1C release.
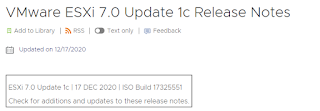
I was looking up the release notes for the 7.0U1C update and spotted this bit of good news.
"With ESXi 7.0 Update 1c, you can use the installer boot option systemMediaSize to limit the size of system storage partitions on the boot media."
https://docs.vmware.com/en/VMware-vSphere/7.0/rn/vsphere-esxi-70u1c.html
I remember this being a design consideration for the new stack that I was deploying at work. I needed to have more than 150GB for the boot media.
Considering that I have 512GB per host there, it probably doesn't make sense to use this new option...
but on my homelab with 24GB of RAM per host, or an embedded deployment in VMware workstation... this could save money and space.
Jason
Happy New Year!
This year I am continuing my journey with VMware solutions and I want to share more with the community along the way.
I am currently studying to attempt the VCAP tests for DataCenter Design and Deploy.
I have an expanded homelab with some upgraded components and I will be doing some live streams as I study for the test.
Jason
Broadcom announces VMWare licensing Changes
Today we wake up with the answer to the long awaited question of how Broadcom would change the license requirements for VMware products. Re...
-
Here is a quick tip for anyone that has deployed an ESXi host from a home network or received DHCP values that didn't match your intend...
-
VMware deprecated a significant amount of hardware and operating systems with the ESXi 8.0 release. However, it is still possible to install...
-
I ran into a bit of an odd issue today. After having a load of trouble with a bad boot media on vSAN cluster, I had actually managed to sta...


